
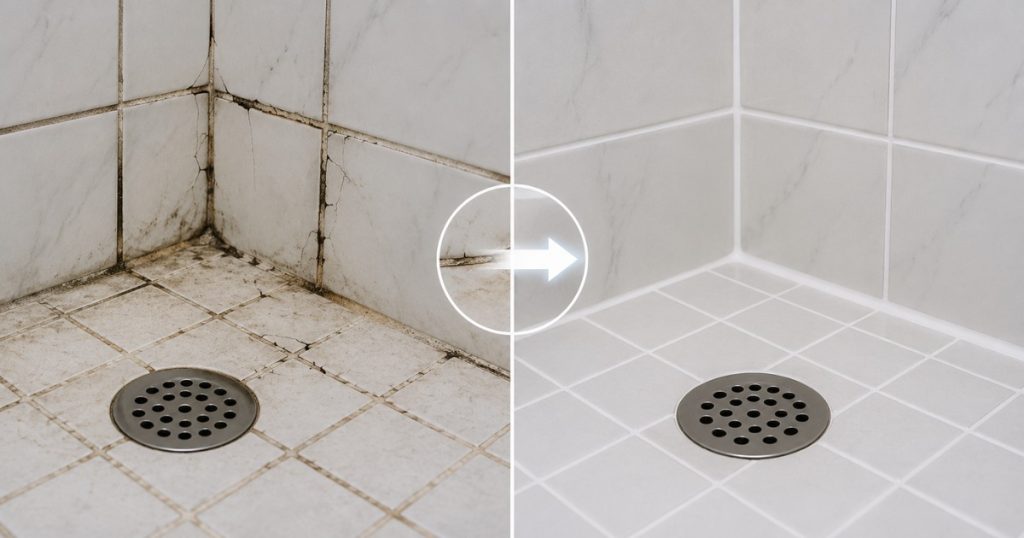
Cracked shower grout may look like a minor cosmetic issue, but it can quickly lead to bigger problems. When you fix cracked shower grout promptly, you help prevent water from seeping behind the tiles, which can cause mould, loose tiles and expensive bathroom repairs. The key is to spot the warning signs early, understand why the grout has failed, and use the right repair method.
The good news is that you can often Fix Cracked Shower Grout before the problem gets worse. The key is to spot the warning signs early, understand why the grout has cracked and choose the right repair method.
For homeowners across New Zealand, keeping a shower properly maintained is especially important because bathrooms deal with moisture every day. A small crack that seems harmless today may become a costly issue if you leave it for months.
In this guide, we cover essential tips to help you repair damaged grout, protect your shower and reduce the risk of hidden water damage.
Why You Should Fix Cracked Shower Grout Quickly
Grout fills the joints between tiles and helps create a neat, durable tiled surface. While grout itself should not be treated as the only waterproofing layer in a shower, damaged grout can still allow more moisture to enter the tiled system and may indicate movement or deterioration underneath.
If you notice cracking, crumbling or missing sections, it is worth investigating the issue rather than simply ignoring it.
When you Fix Cracked Shower Grout early, you can help maintain the tiled surface and stop minor damage from becoming more extensive. Delaying repairs may allow moisture to remain behind tiles, contribute to loose sections or reveal an existing waterproofing problem.
Common warning signs include:
- Visible cracks along grout lines
- Grout breaking away between tiles
- Dark or permanently damp grout
- Loose or hollow-sounding tiles
- Musty smells around the shower
- Stains on nearby walls or ceilings
- Silicone pulling away from corners
- Recurring mould in the same areas
If you notice several of these signs together, a simple surface repair may not be enough.
1. Find Out Why the Shower Grout Has Cracked
Before reaching for a grout repair product, work out why the damage happened in the first place.
Grout can crack for several reasons. Natural building movement, incorrect installation, ageing materials and movement in the tiled surface can all cause grout joints to fail. Cracks can also appear when grout is used in areas where a flexible sealant would have been more appropriate.
This is why the first step to Fix Cracked Shower Grout properly is identifying the cause.
A small isolated crack may simply be the result of ageing grout. However, long cracks running across several tiles may point to movement beneath the tiled surface. If the same crack keeps returning after every repair, there may be a deeper issue that needs professional attention.
Check the tiles around the damaged area as well. Gently tap them and look for movement, lifting or unusual sounds. If tiles are loose, repairing the grout alone is unlikely to provide a lasting result.
Understanding the cause helps you choose a repair that actually lasts instead of applying a quick patch that fails again a few weeks later.
2. Remove All Loose and Damaged Grout
One of the biggest mistakes people make when trying to fix cracked shower grout is applying fresh grout directly over the damaged material. New grout needs a clean and stable joint to bond properly. If you simply cover loose or crumbling grout, the new material may crack or fall out again.
Use a suitable grout removal tool to carefully remove the damaged sections. Work slowly so you do not chip the surrounding tiles, and remove enough material to create a clean joint for the replacement grout. Once the damaged grout has been removed, clear away all dust and debris. A vacuum can help remove loose particles from the joints, after which you can clean the area using a suitable bathroom cleaner. Avoid leaving soap residue or cleaning chemicals inside the joint before applying new grout, and allow the area to dry thoroughly. Applying grout to a wet or dirty joint can affect adhesion and reduce the quality of the repair.
Preparation often determines whether your repair lasts for years or fails within months. A clean, stable surface gives the new material a much better chance of bonding correctly, so take your time with this stage rather than rushing straight into the repair. If the old grout feels soft, damp, or unusually weak across a large section of the shower, consider getting the area professionally assessed before continuing.
3. Check for Signs of Hidden Water Damage
Before you Fix Cracked Shower Grout, look carefully for signs that water may already have travelled beyond the surface.
Cracked grout does not automatically mean you have serious water damage. However, ongoing moisture, loose tiles or deterioration around the shower can indicate a bigger problem.
Look for swollen skirting boards, peeling paint, damp smells, staining or soft areas on walls next to the shower. If your shower sits above another room, check the ceiling below for water marks or discolouration.
You should also pay attention to changes inside the shower itself. Tiles that suddenly become loose or grout that repeatedly darkens may require further investigation.
New Zealand homeowners can find general guidance about building and maintenance responsibilities through the official Ministry of Business, Innovation and Employment building information website at building.govt.nz.
If you suspect a significant leak or waterproofing failure, avoid simply covering the crack with fresh grout. Surface repairs may hide the visible symptom without fixing the underlying cause.
A professional inspection can help determine whether you need a straightforward grout repair or more extensive remedial work.
4. Choose the Right Grout for Your Shower
Not all grout products perform the same way, so choosing the right one is essential when fixing cracked shower grout. The best option depends on your tile type, joint width, shower design and existing grout system.
Cement-based grout is the most common choice and comes in various formulations—some need sealing, while others include performance additives. Epoxy grout offers superior resistance to moisture and staining but is harder to apply correctly. Always confirm the product is suitable for wet areas and compatible with your tiles. For small repairs, match the colour as closely as possible, remembering that older grout often darkens or fades over time.
Don’t overlook silicone. Grout and silicone serve different purposes. Flexible sealant belongs in movement joints such as shower corners and where tiles meet fixtures. Rigid grout used in these areas often cracks. If damage is concentrated in the corners, replace the failed silicone rather than adding more grout. Using the right material in the right place greatly improves the longevity of the repair.
5. Apply New Grout Correctly for a Stronger Repair
Once the damaged grout has been removed and the area is completely clean and dry, you can begin applying the replacement material.
Follow the manufacturer’s instructions carefully. Mixing ratios, application methods and curing times can vary between products.
Press the grout firmly into the prepared joints so there are no obvious gaps or air pockets. Work across the area carefully and remove excess material from the tile surface using the recommended method.
Do not overwork the grout or use too much water during cleanup. Excess water can affect some cement-based grout products and may weaken the finished result.
After application, give the grout enough time to cure before using the shower.
This is where patience really pays off.
Using the shower too soon may expose the fresh grout to moisture before it has properly cured. Even if the surface looks dry, the material may still need additional time to develop its intended strength.
If you want to Fix Cracked Shower Grout successfully, always follow the curing period specified by the product manufacturer.
6. Protect the Grout and Improve Bathroom Ventilation
Clean the shower regularly with products suitable for your tiles and grout. Avoid harsh methods that can damage the surface over time. Good ventilation is just as important. Use an effective extractor fan and open a window where possible after showering to clear excess moisture. Official New Zealand guidance on managing indoor moisture is available through the Tenancy Services Healthy Homes information at tenancy.govt.nz .
Wiping down shower surfaces after use also helps. Depending on the product, a suitable grout sealer can reduce staining and moisture absorption in some cement-based systems. Remember, though, sealing is not a substitute for proper waterproofing — it will not fix a failed membrane.
Check the grout every few months and address small cracks early, especially in corners, around fixtures, and areas that stay damp longer. Early maintenance is far easier than dealing with larger bathroom repairs later.
7. Know When to Call a Professional Grout Repair Expert
DIY repairs can work well for small, isolated areas of damaged grout. However, not every shower grout problem is a simple weekend job.
If the cracking covers a large area, keeps returning or appears alongside loose tiles and water stains, it is sensible to get professional advice.
An experienced tile and grout specialist can inspect the condition of the tiled surface, remove deteriorated grout and determine the most appropriate repair approach.
You should consider professional help if:
- Cracks return soon after repairs
- Several tiles feel loose
- Large sections of grout are crumbling
- You notice water damage outside the shower
- There is persistent mould or a musty smell
- Silicone and grout are failing together
- You suspect waterproofing problems
- You are unsure what is causing the damage
Professional repairs can also provide a cleaner and more consistent finish, especially when large areas need regrouting.
Trying to Fix Cracked Shower Grout without addressing movement or underlying moisture issues may only provide a temporary result. Getting the cause right from the beginning can save you a fair bit of hassle down the track.
Common Mistakes to Avoid When You Fix Cracked Shower Grout
Even a relatively straightforward repair can go wrong if you skip important preparation steps.
One common mistake is placing new grout directly over damaged grout. Another is using grout in flexible movement joints where silicone or another suitable sealant should be used.
Rushing the curing process can also cause problems. If the product needs a specific amount of time before exposure to water, follow that recommendation.
Avoid assuming that every crack is purely cosmetic. Repeated grout failure may indicate movement in the substrate, loose tiles or another issue beneath the surface.
Finally, do not rely on grout or surface sealers as your shower’s primary waterproofing system. Properly constructed wet areas use appropriate waterproofing systems behind or beneath the finished tiled surface.
If you are carrying out significant bathroom building work, you can check relevant requirements and guidance through New Zealand’s official Building Performance resources.
Can Cracked Shower Grout Cause Water Damage?
Cracked grout can contribute to moisture getting into the tiled assembly, particularly when the damage is extensive or left untreated for a long time.
However, a correctly constructed shower should also have a suitable waterproofing system behind the tiles. This means a small grout crack does not necessarily mean water is immediately entering the building structure.
The bigger concern is when cracked grout appears alongside other warning signs.
If you have loose tiles, persistent dampness, staining or water appearing outside the shower, the problem deserves closer attention.
The safest approach is to Fix Cracked Shower Grout early while remaining alert to signs of a deeper waterproofing issue.
How Often Should You Check Shower Grout?
There is no fixed schedule that suits every bathroom, but checking your shower every few months is a good habit.
Look closely at grout joints while cleaning. Small hairline cracks are much easier to spot when the surface is clean.
Pay extra attention to high-use showers and bathrooms with limited ventilation. These areas may experience more moisture and require more frequent maintenance.
If you spot a problem, do not leave it until your next major bathroom clean. Taking action early can make the repair simpler and help prevent the damage from spreading.
Is It Better to Repair or Completely Regrout a Shower?
The answer depends on the condition of the existing grout.
If only one or two small areas are damaged and the surrounding grout remains strong, a targeted repair may be enough.
If grout is cracking, crumbling or discoloured throughout the shower, complete regrouting may provide a better and more consistent result.
A professional can help assess whether local repairs will solve the problem or whether removing and replacing a larger section makes more sense.
When you Fix Cracked Shower Grout, the goal should not simply be to hide the crack. The goal is to create a durable repair that suits the actual condition of the shower.
Final Thoughts: Fix Cracked Shower Grout Before a Small Problem Grows
Cracked shower grout may seem like a minor issue, but leaving it untreated can lead to ongoing moisture problems and further damage to your tiled surfaces. Acting early to Fix Cracked Shower Grout can help maintain your shower and prevent a small repair from becoming a costly headache.
Start by identifying the cause, removing damaged grout and using the right products for wet areas. If cracks keep returning, tiles become loose or you notice signs of water damage, professional attention may be the best option.
Stay on top of grout maintenance and deal with problems as soon as they appear. For professional Grout repair and reliable bathroom solutions, call our team today on 0800 08 4444.